
mac macOS 11 and over

Barcode labels on Mac
SASHIKOMI allows you to create barcode labels instantly.
As the name SASHIKOMI means Insertion in Japanese, you may print labels with insertion data.
There are some situations when we want to make a lot of barcode label;
- Put a barcode tag seal on every item in our office
- Entrance card for visitors
- Numbered tickets for waiting customers who visits your shop
- Check that a right equipment is chosen by scanning the barcode attached to it
- Goods catalog with barcode and photoetc.
SASHIKOMI Label Maker has builtin barcode generators; QR code, ITF, Code39, Code128 and EAN/JAN.
So, you do NOT need to create barcode images separately one by one with other barcode generator app and put it to the label document. You just add a barcode element to the label and add barcode values as insertion data.
Three steps to get your labels
- Design your label
- Choose Insertion fields
- Maintain Insertion Data
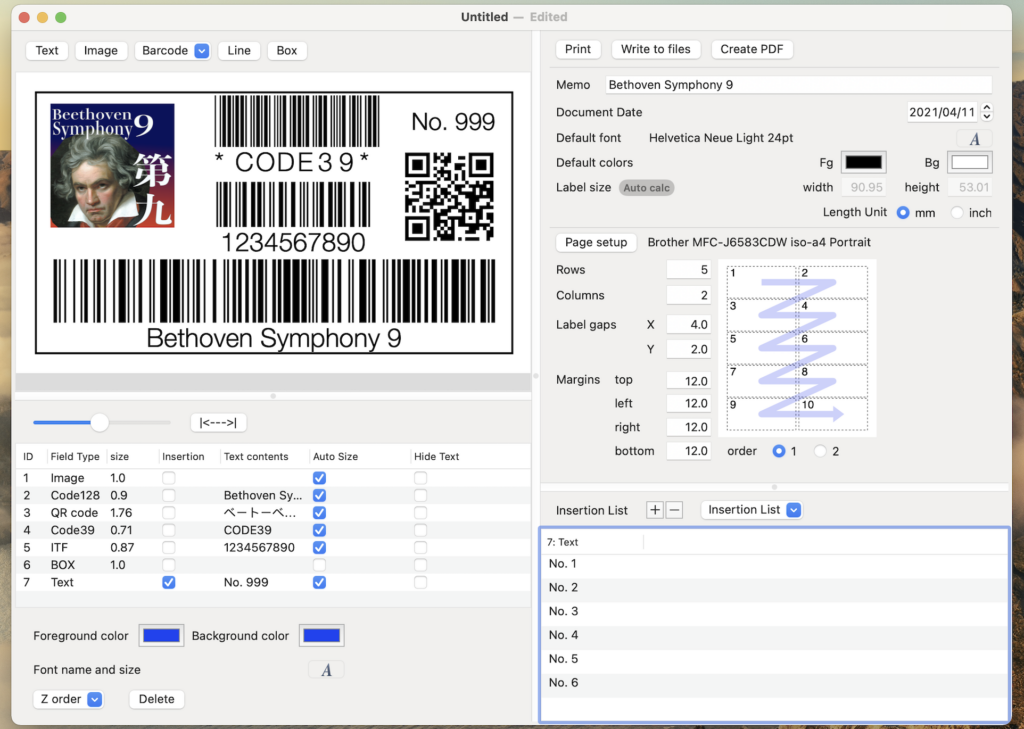
1. Design your label
- Decide number of labels in a sheet of paper to determine the label size.
- Then, simply add fields of [Text], [Barcode] or [Image] on the label editing view.
2. Choose Insertion fields
- Choose one or more fields as insertion field.
- You may use [Text], [Barcode] and [Image] field for insertion.
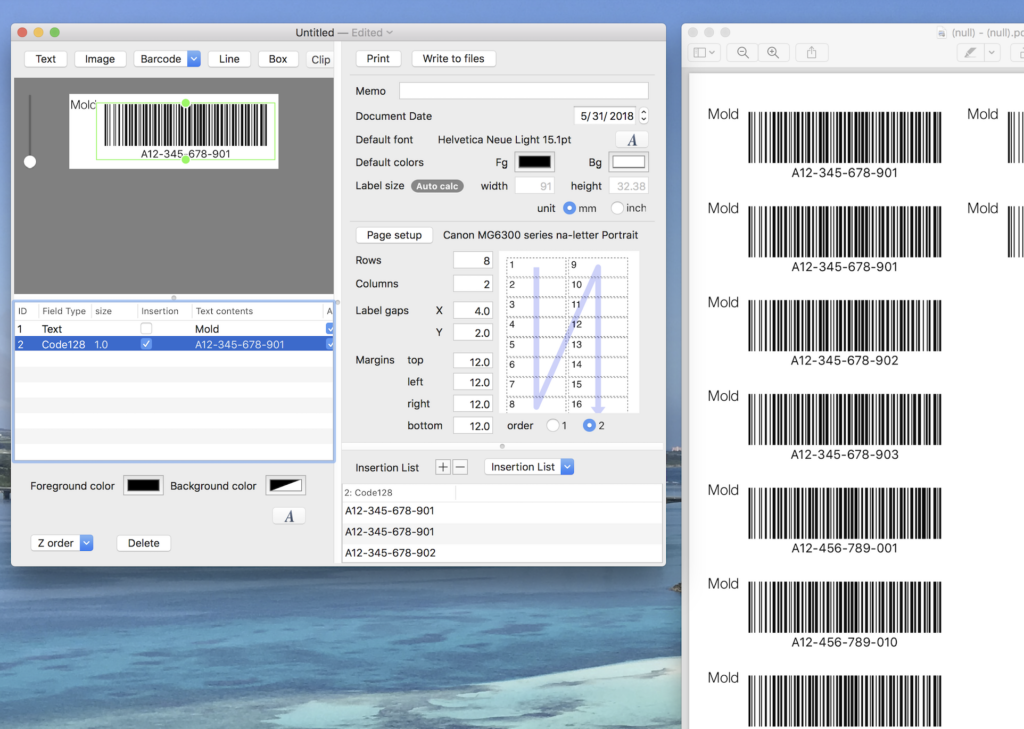
3. Maintain Insertion Data
- Add Insertion data to the list
- You may manually input string value to Text field and Barcode field or you may upload the strings from a text file.
- Images are maintained by manually selecting an image file with dialog box or directory drag and drop it to the insertion list.